Building a Mini-Fishroom
Design Goals
We were interested in building a small fishroom to house some of
the interesting freshwater fish unsuitable for our community tanks
and for holding pairs of saltwater fish for some marine breeding
attempts. We were looking to build a system that would hold from 6-9
10 to 20 gallon tanks, and provide enough room for fry grow-out. We
were not willing to modify the structure of the house or do any hard
plumbing. The tanks are individually heated and tightly covered to
eliminate humidity problems as the tanks sit in a home office/computer
room. Hot and cold water feeds have been teed off the appliance
sources in a nearby closet housing our washer and drier. Wastewater
is siphoned into buckets then pumped via a powerhead and flexible
polyethylene tubing into the washer drainpipe. All tanks are stocked
lightly and filtered by air-driven filters. The idea was to keep
everything flexible, simple, and non-permanent.
Construction of Racks
 The basic design of our racks was inspired by those seen at
Randy's Aquaria. The idea was to
design two or three modular 3 tier racks which we could easily move around
or expand. We designed one rack for a standard All-Glass 10 gallon leaders
and one rack to hold
All-Glass 20 gallon long tanks. The 20L rack also houses 5 2.5
gallon All-Glass tanks on the top shelf which are used for fry rearing and
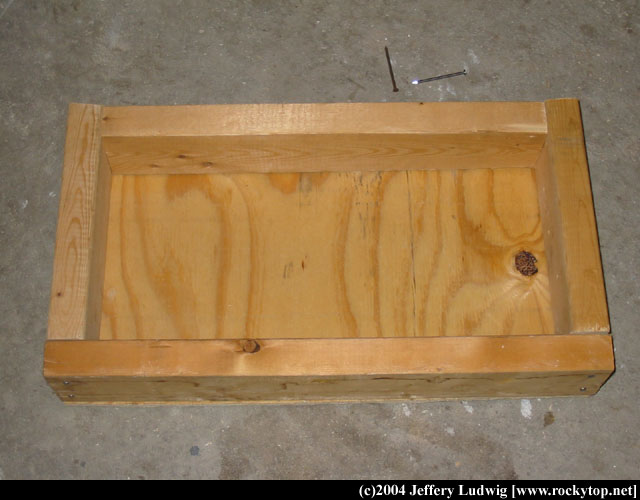
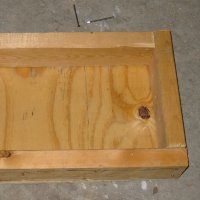
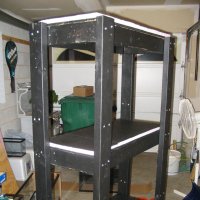
quarantine. We framed each shelf in 2x4s so that the trim of the
tanks sit in the middle of each 2x4. The top is covered with
3/4" plywood and then a layer of pinkboard (more later). You'll
notice we used 2x4s on all four sides of the shelf, if we were to redesign
them again we would leave off the front 2x4 and taper the 2x4s on the
sides. The point of doing this is to maximize working room above the
tank.
The basic design of our racks was inspired by those seen at
Randy's Aquaria. The idea was to
design two or three modular 3 tier racks which we could easily move around
or expand. We designed one rack for a standard All-Glass 10 gallon leaders
and one rack to hold
All-Glass 20 gallon long tanks. The 20L rack also houses 5 2.5
gallon All-Glass tanks on the top shelf which are used for fry rearing and
quarantine. We framed each shelf in 2x4s so that the trim of the
tanks sit in the middle of each 2x4. The top is covered with
3/4" plywood and then a layer of pinkboard (more later). You'll
notice we used 2x4s on all four sides of the shelf, if we were to redesign
them again we would leave off the front 2x4 and taper the 2x4s on the
sides. The point of doing this is to maximize working room above the
tank.
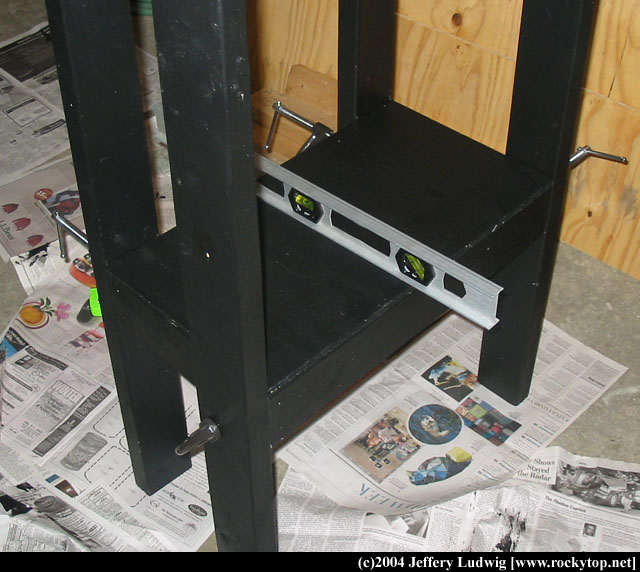
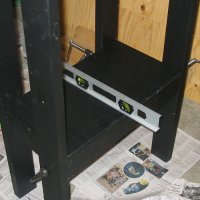 After we made a shelf for each tank, they were painted black using Rustoleum
black indoor/outdoor craft paint. I recommend using something with
decent water resistance. Each shelf was then mounted on four vertical
2x4s, the foremost vertical supports were mounted on the sides to maximize
viewing area and allow for easy access into the tank. It is very
important to mount these shelves completely level. To accomplish
this we used 4 heavy duty C-clamps and a level, adjusting until everything
looked okay. We then sunk 4 woodscrews into each vertical support to
hold the shelves up.
After we made a shelf for each tank, they were painted black using Rustoleum
black indoor/outdoor craft paint. I recommend using something with
decent water resistance. Each shelf was then mounted on four vertical
2x4s, the foremost vertical supports were mounted on the sides to maximize
viewing area and allow for easy access into the tank. It is very
important to mount these shelves completely level. To accomplish
this we used 4 heavy duty C-clamps and a level, adjusting until everything
looked okay. We then sunk 4 woodscrews into each vertical support to
hold the shelves up.
 Originally we kept the tanks directly on the plywood, but we actually managed to
crack a brand new 10 gallon tank, as it did not sit flush. A fellow
hobbyist suggested using pinkboard found in the insulation isle of most
home improvement stores. Other than being somewhat of a pain to
paint, the pinkboard solved the problem. It also is an added cushion
against bad craftsmanship (which was a recurring problem during the entire
project). We built the entire project using a circular saw and
electric drill. If you have access to a power miter saw, radial arm
saw, or table saw its worth the extra time and effort to get all of your
cuts as flush as possible.
Originally we kept the tanks directly on the plywood, but we actually managed to
crack a brand new 10 gallon tank, as it did not sit flush. A fellow
hobbyist suggested using pinkboard found in the insulation isle of most
home improvement stores. Other than being somewhat of a pain to
paint, the pinkboard solved the problem. It also is an added cushion
against bad craftsmanship (which was a recurring problem during the entire
project). We built the entire project using a circular saw and
electric drill. If you have access to a power miter saw, radial arm
saw, or table saw its worth the extra time and effort to get all of your
cuts as flush as possible.
Filtration
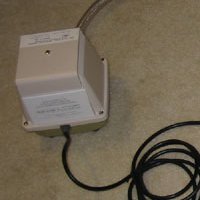 We originally planned on using the largest hobby-grade air-pumps we could
find to drive the sponge filter in all of tanks. We found these
pumps to be basically worthless, especially pumping against 5-6 feet of
head in some places. A call to Jehmco
and purchase of a LPH #26 linear air pump with 20 valve manifold solved
all of our problems. The pump is completely silent and we have
plenty of extra air to expand to our third rack of tanks should we decide
to do so in the future. While expensive, in the long run it is much
cheaper than purchasing 6 or 7 $60 diaphragm pumps. Be sure to
pickup a spool of airline tubing and manifold with the airpump order.
We originally planned on using the largest hobby-grade air-pumps we could
find to drive the sponge filter in all of tanks. We found these
pumps to be basically worthless, especially pumping against 5-6 feet of
head in some places. A call to Jehmco
and purchase of a LPH #26 linear air pump with 20 valve manifold solved
all of our problems. The pump is completely silent and we have
plenty of extra air to expand to our third rack of tanks should we decide
to do so in the future. While expensive, in the long run it is much
cheaper than purchasing 6 or 7 $60 diaphragm pumps. Be sure to
pickup a spool of airline tubing and manifold with the airpump order.
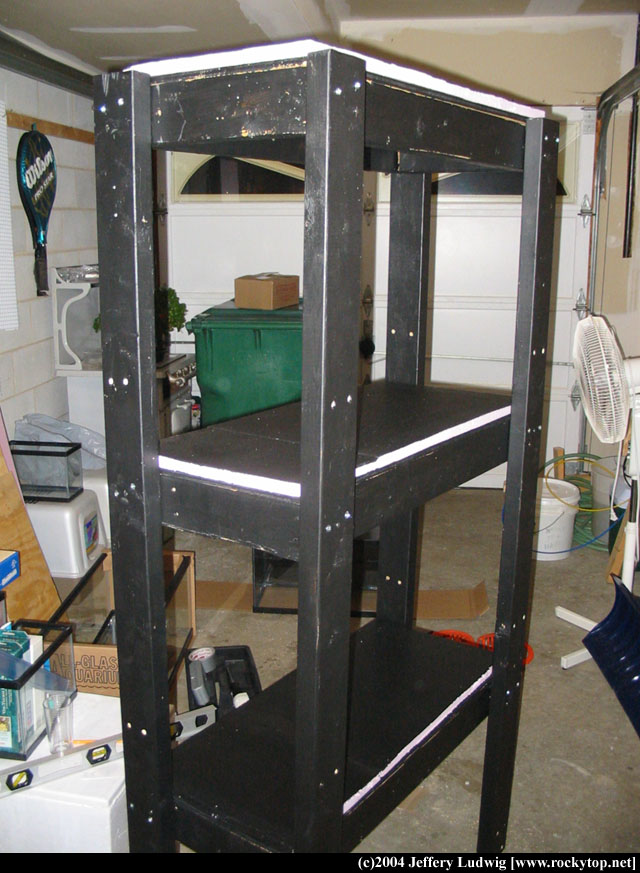
Finished Product
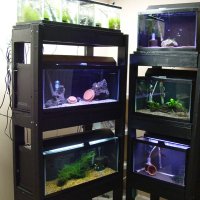 We are very happy with the finished product, although working on the 10
gallons can get a little frustrating due to lack of space. This
system ran for basically an entire (very cold) winter with no noticable
humidity problems. Daily maintenance on the tanks is usually half an
hour or so, everything gets a 30% water change once a week, this takes
roughly 2 hours. As a fan of high-light planted tanks, this allows
me to explore the lower light plants which I have neglected for a few
years - all types of mosses and ferns do really well. Loads of java
moss is the single most valuable resource in the fishroom, fry tanks under
the 4" twin T8 shop light also double up as propagation tanks for
rarer medium light plants.
We are very happy with the finished product, although working on the 10
gallons can get a little frustrating due to lack of space. This
system ran for basically an entire (very cold) winter with no noticable
humidity problems. Daily maintenance on the tanks is usually half an
hour or so, everything gets a 30% water change once a week, this takes
roughly 2 hours. As a fan of high-light planted tanks, this allows
me to explore the lower light plants which I have neglected for a few
years - all types of mosses and ferns do really well. Loads of java
moss is the single most valuable resource in the fishroom, fry tanks under
the 4" twin T8 shop light also double up as propagation tanks for
rarer medium light plants.
|